


Thermal ticket cloud printer use tutorial
Step 1: Log in
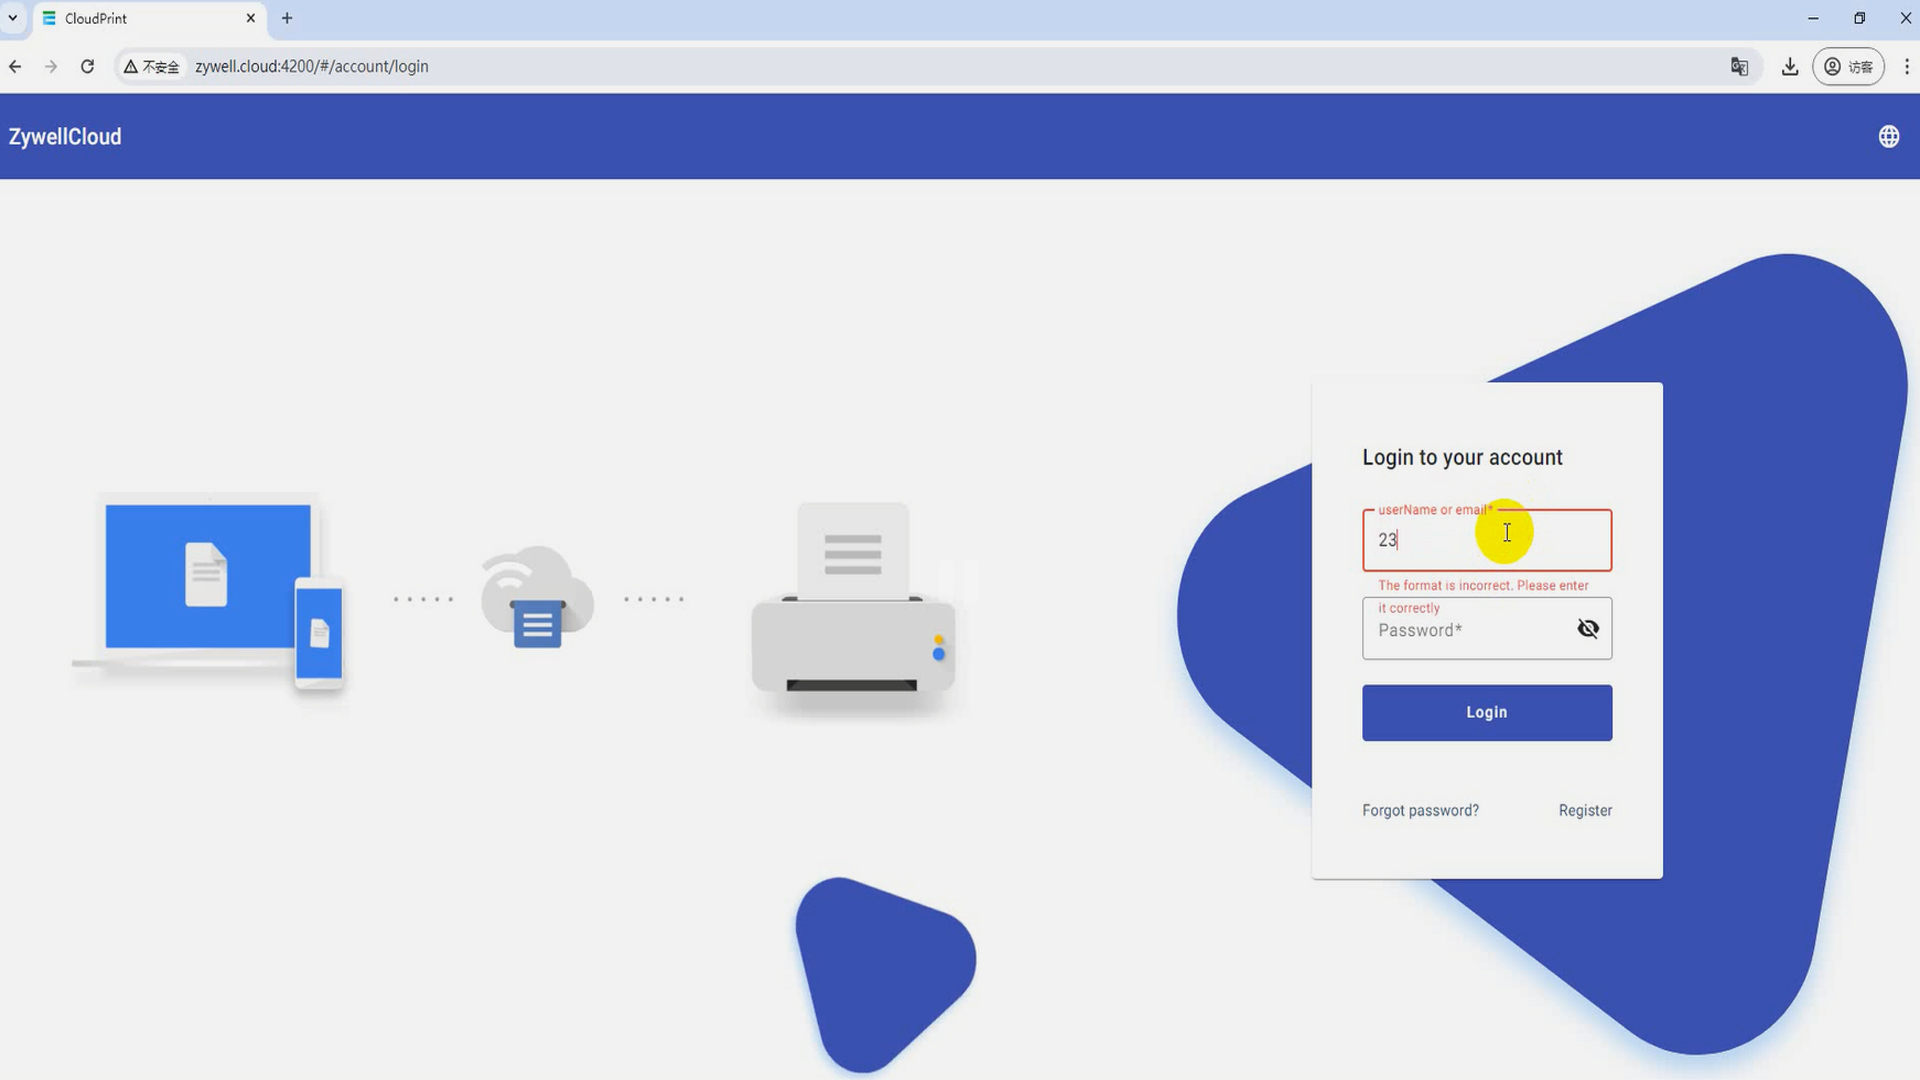
1. Open the browser and enter the Web address:
http://www.zywell.cloud:4200/#/account/login
2.Enter the account password and click "Login" button
Step 2: Menu bar
Click the "Menu" button in the upper left corner to show or hide the menu bar.
Step 3: Bind the printer
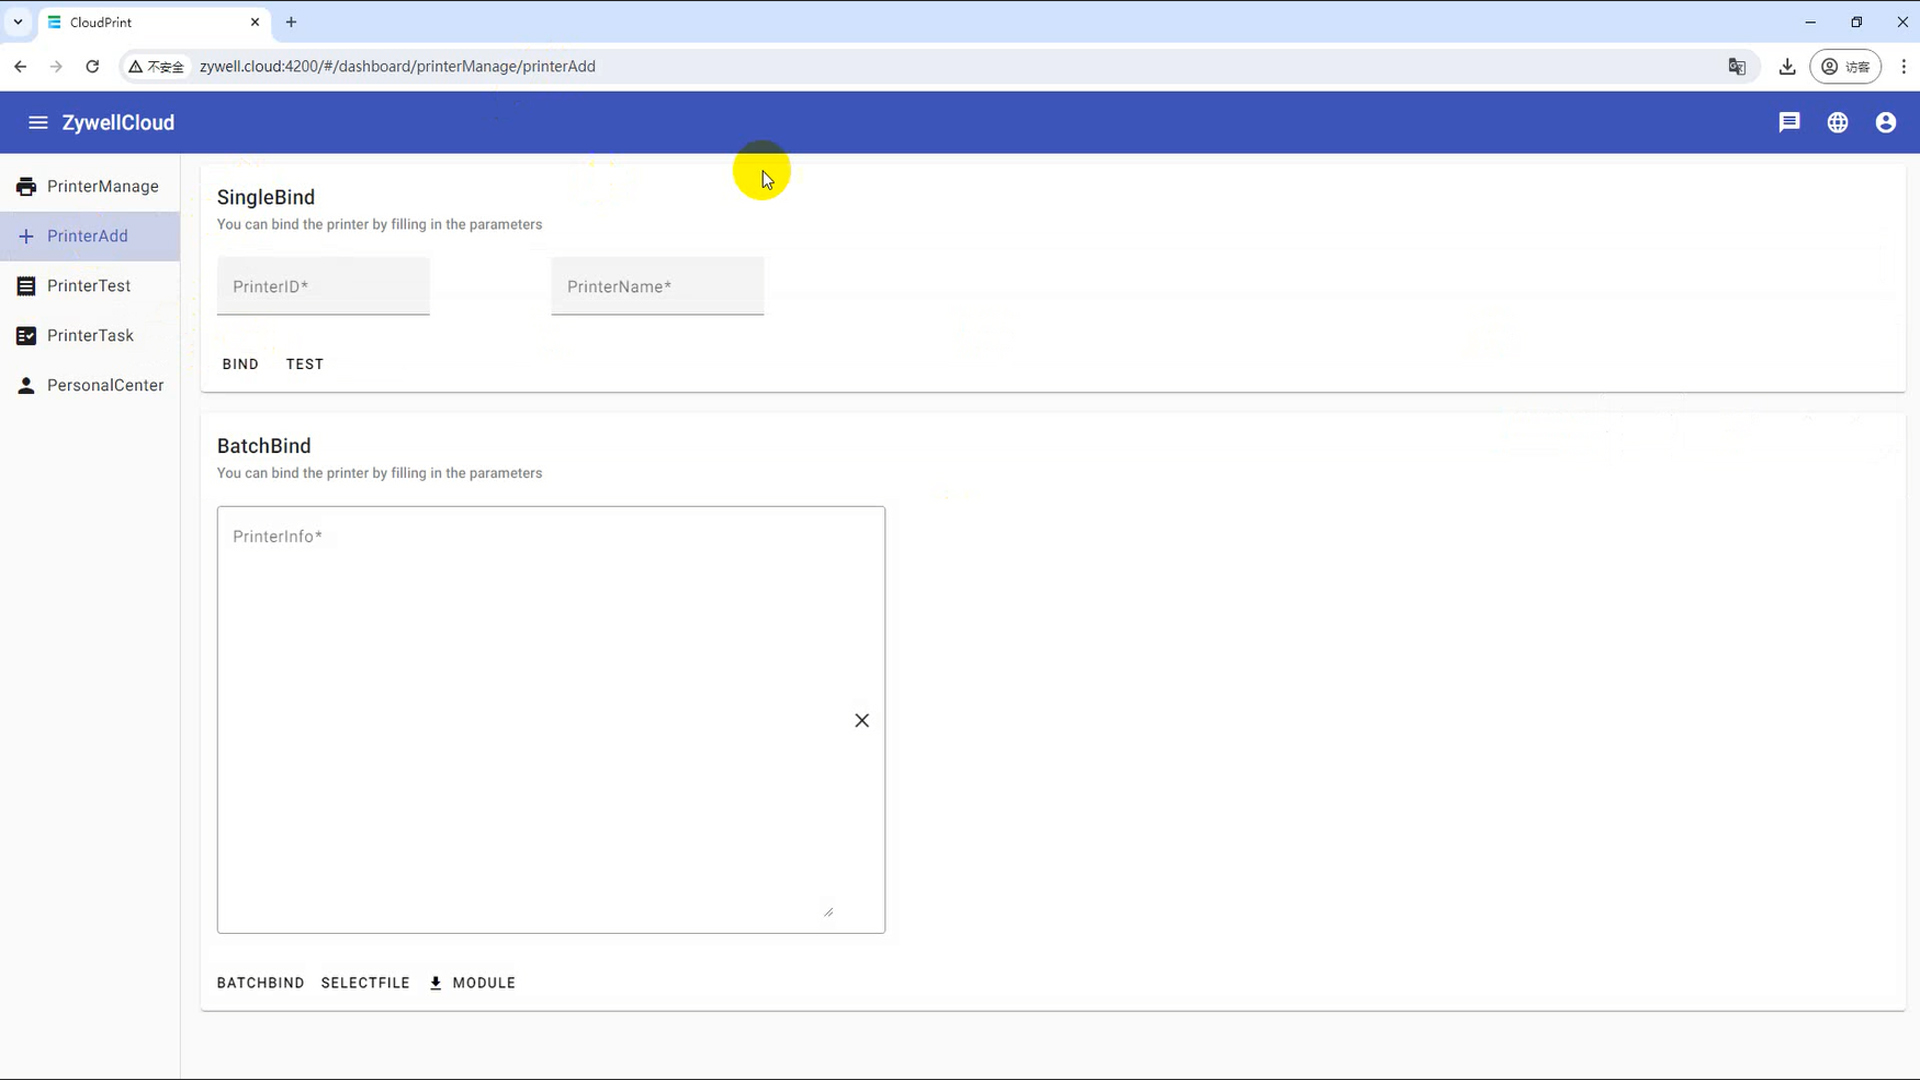
Bind the printer according to the printer ID. Single and multiple printers can be bound. For multiple bindings, you need to download the excel template, fill in the data, and then upload the file for binding.
(1) Single printer binding
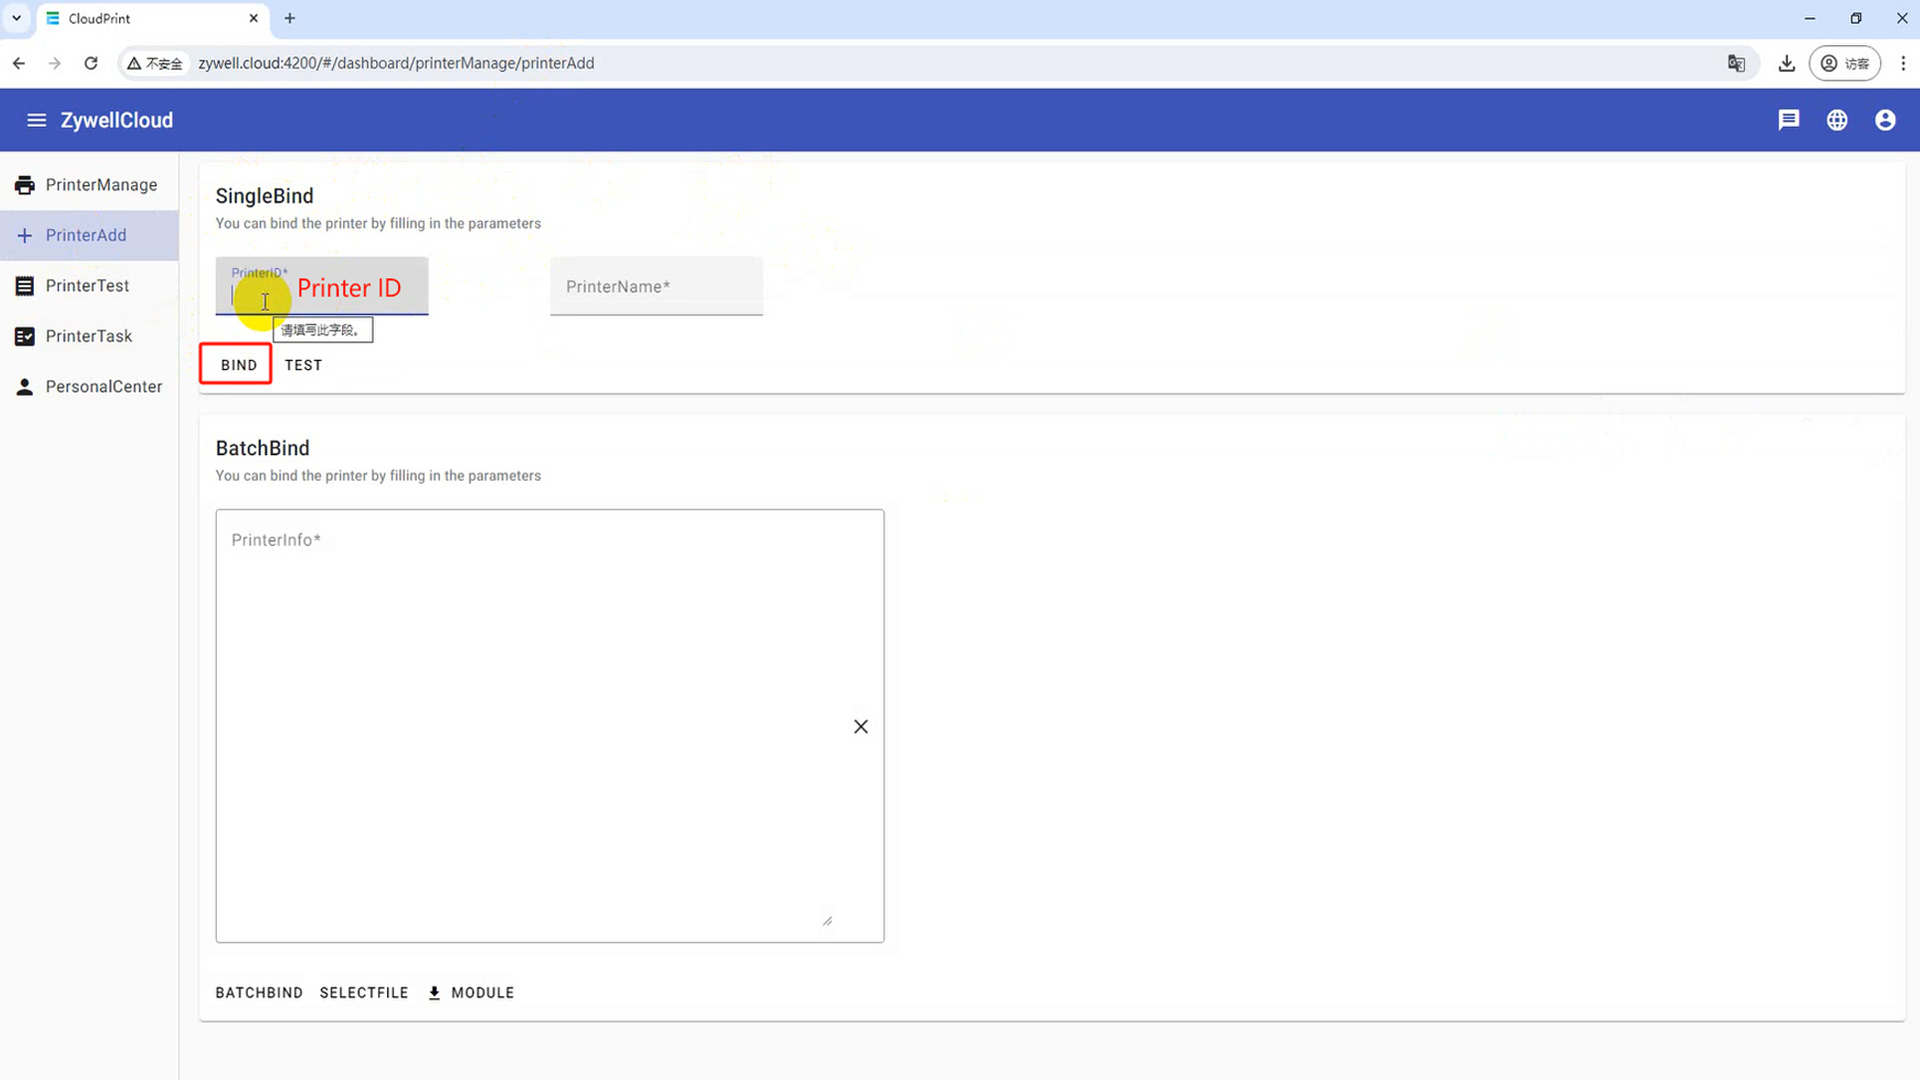
① Under Single Bind, enter the ID of the cloud printer in the Printer ID box
② Enter the printer name in the Printer Name box
③ Click "Bind" button, bind the cloud printer, pop-up success message, binding success
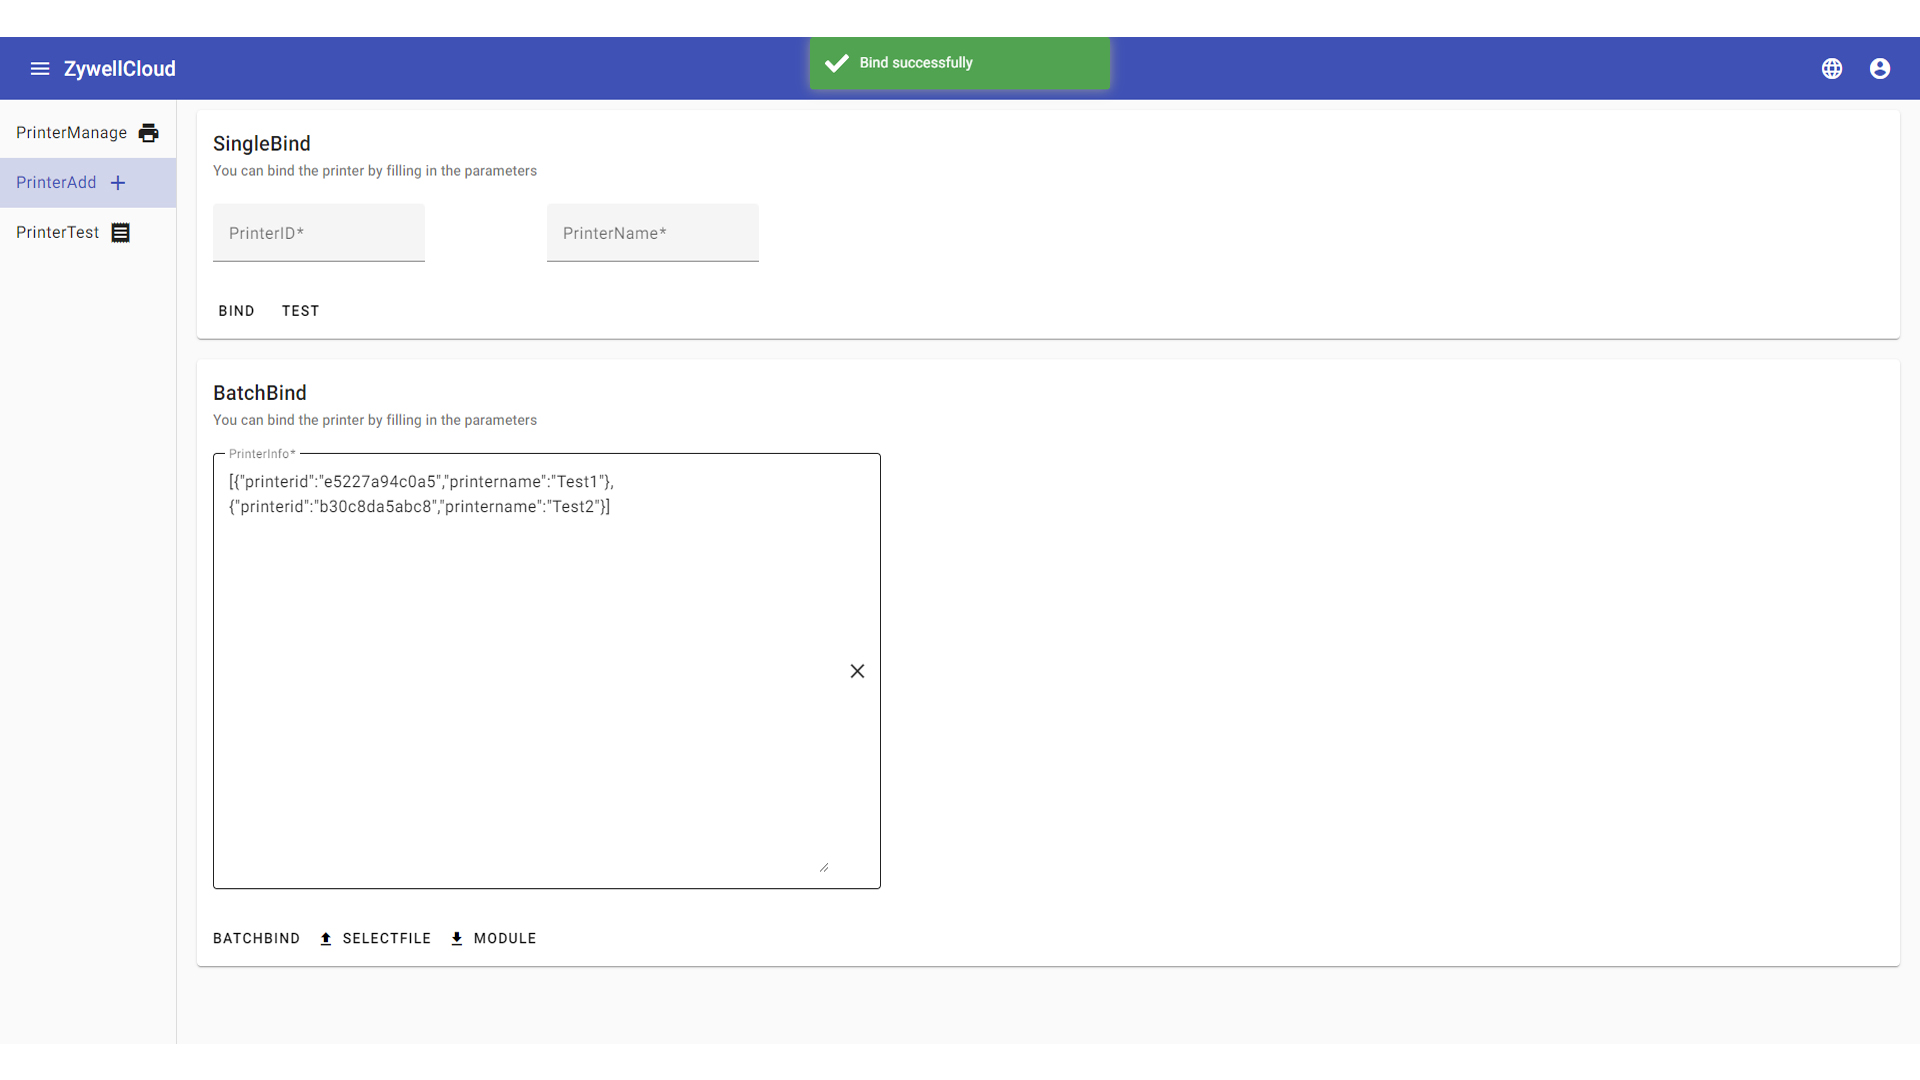
(2) Batch binding
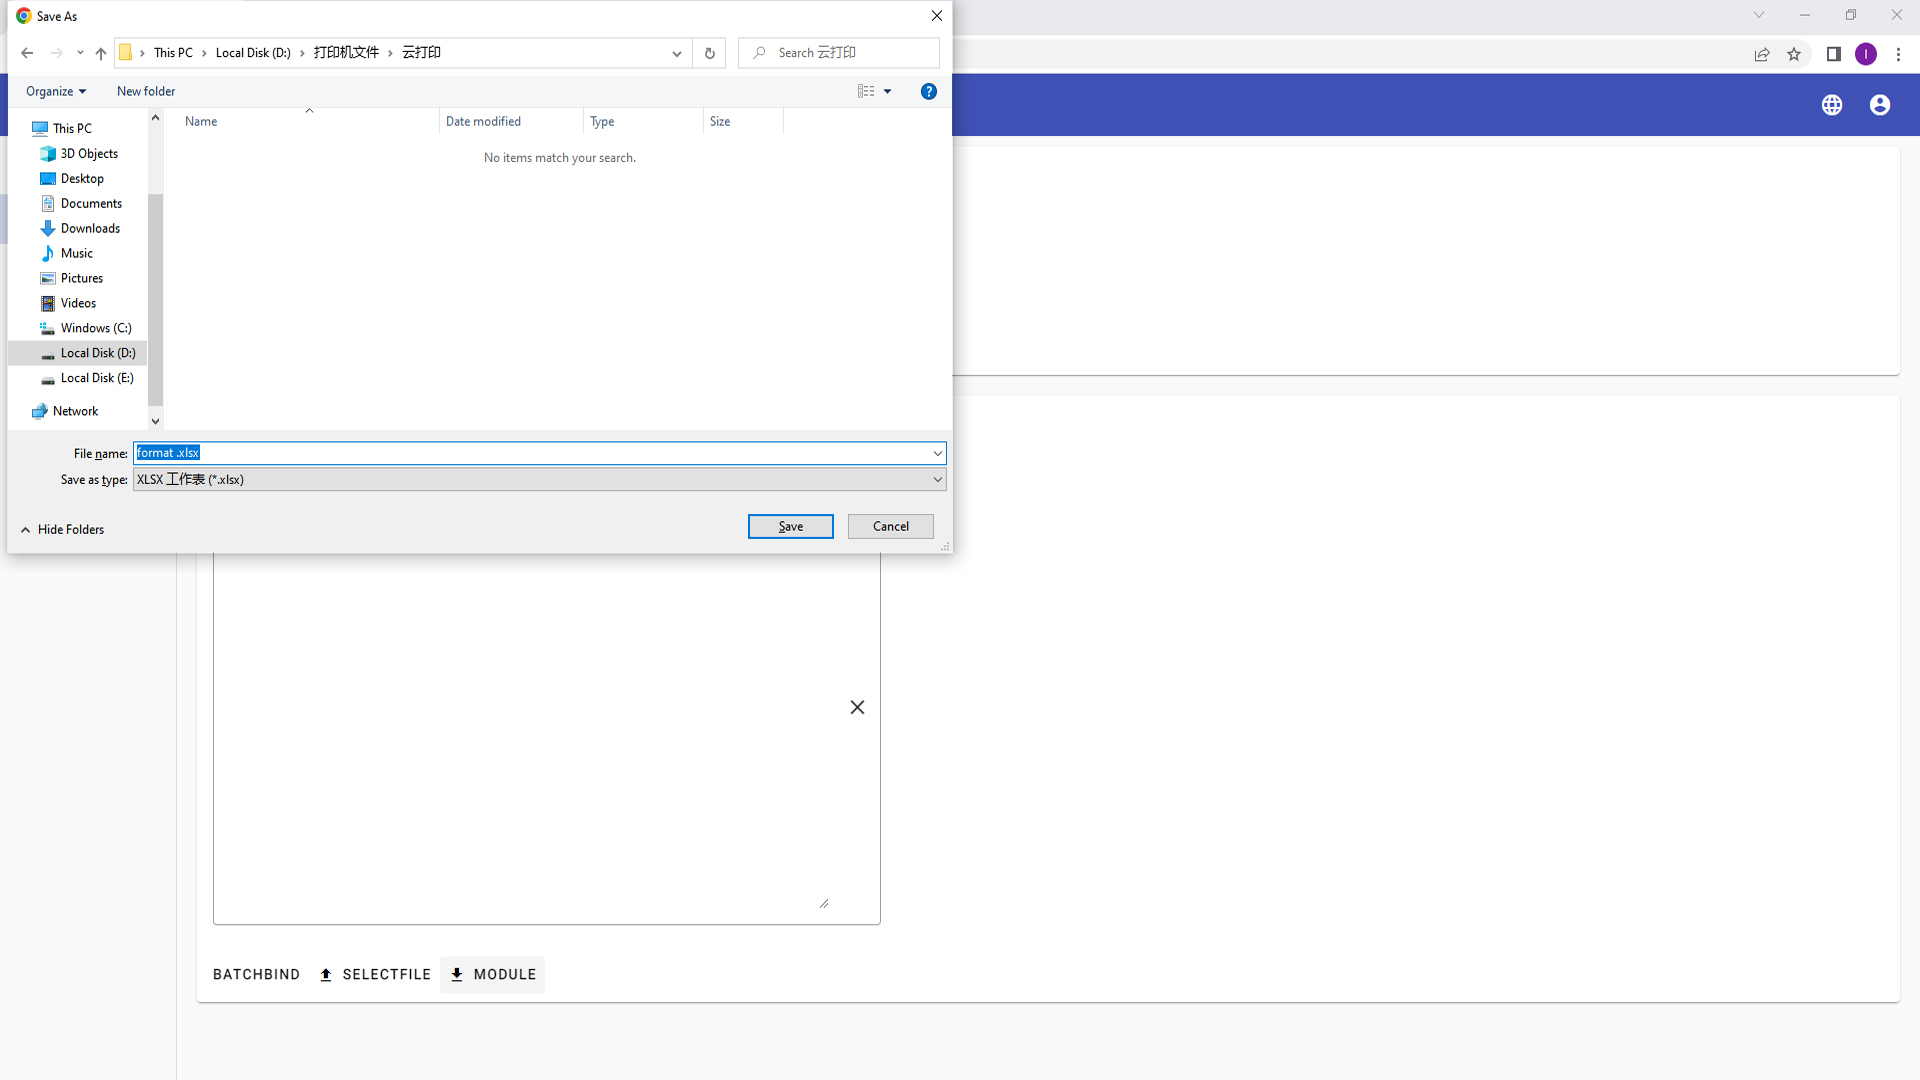
① In the Binding List column, click Template. The file saving window is displayed. Click Save to download the batch import template document
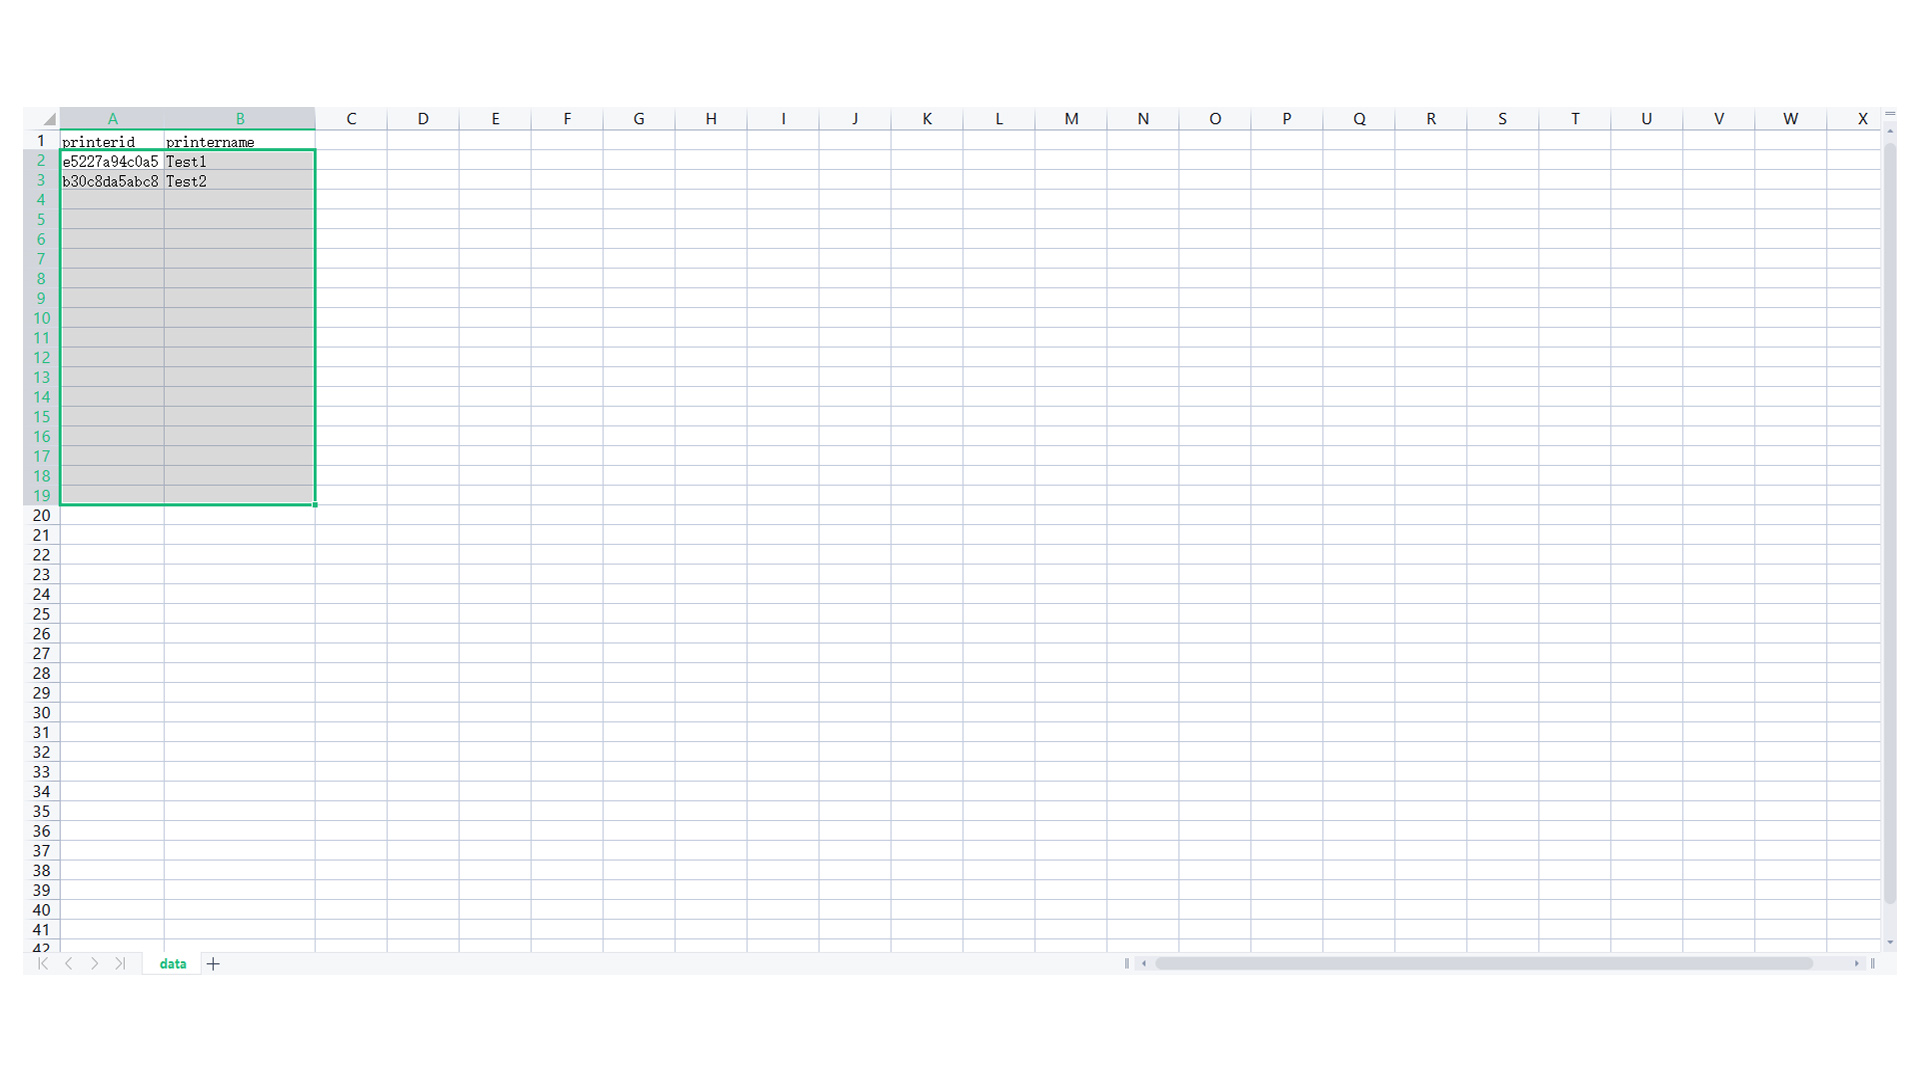
② Open the template file, enter the cloud printer ID and printer name in PrinterID and PrinterName, and save the template file
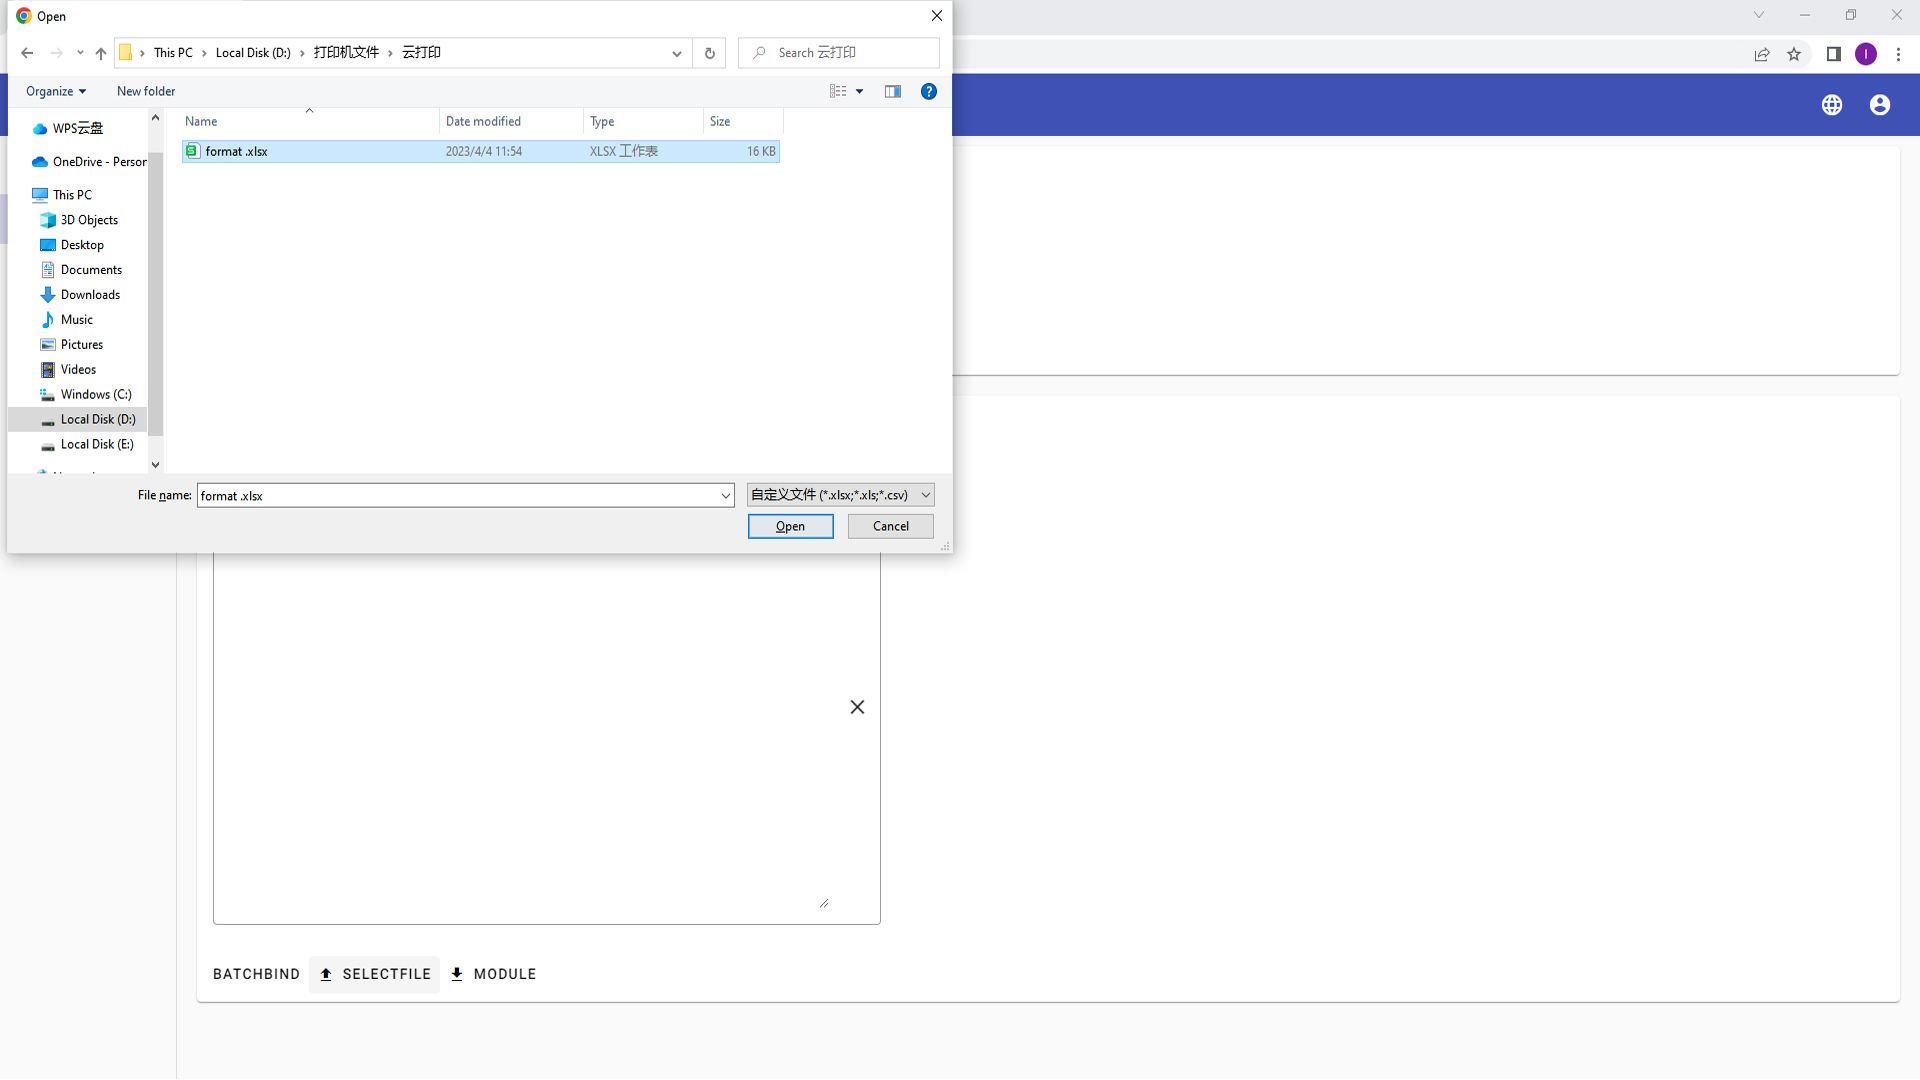
③ Click the "Select file" button, the file selection window will pop up, select the template document, and click the "Open" button to import the cloud printer in batches
④ Click "Batch" button, batch bind cloud printer, pop-up success message, binding success
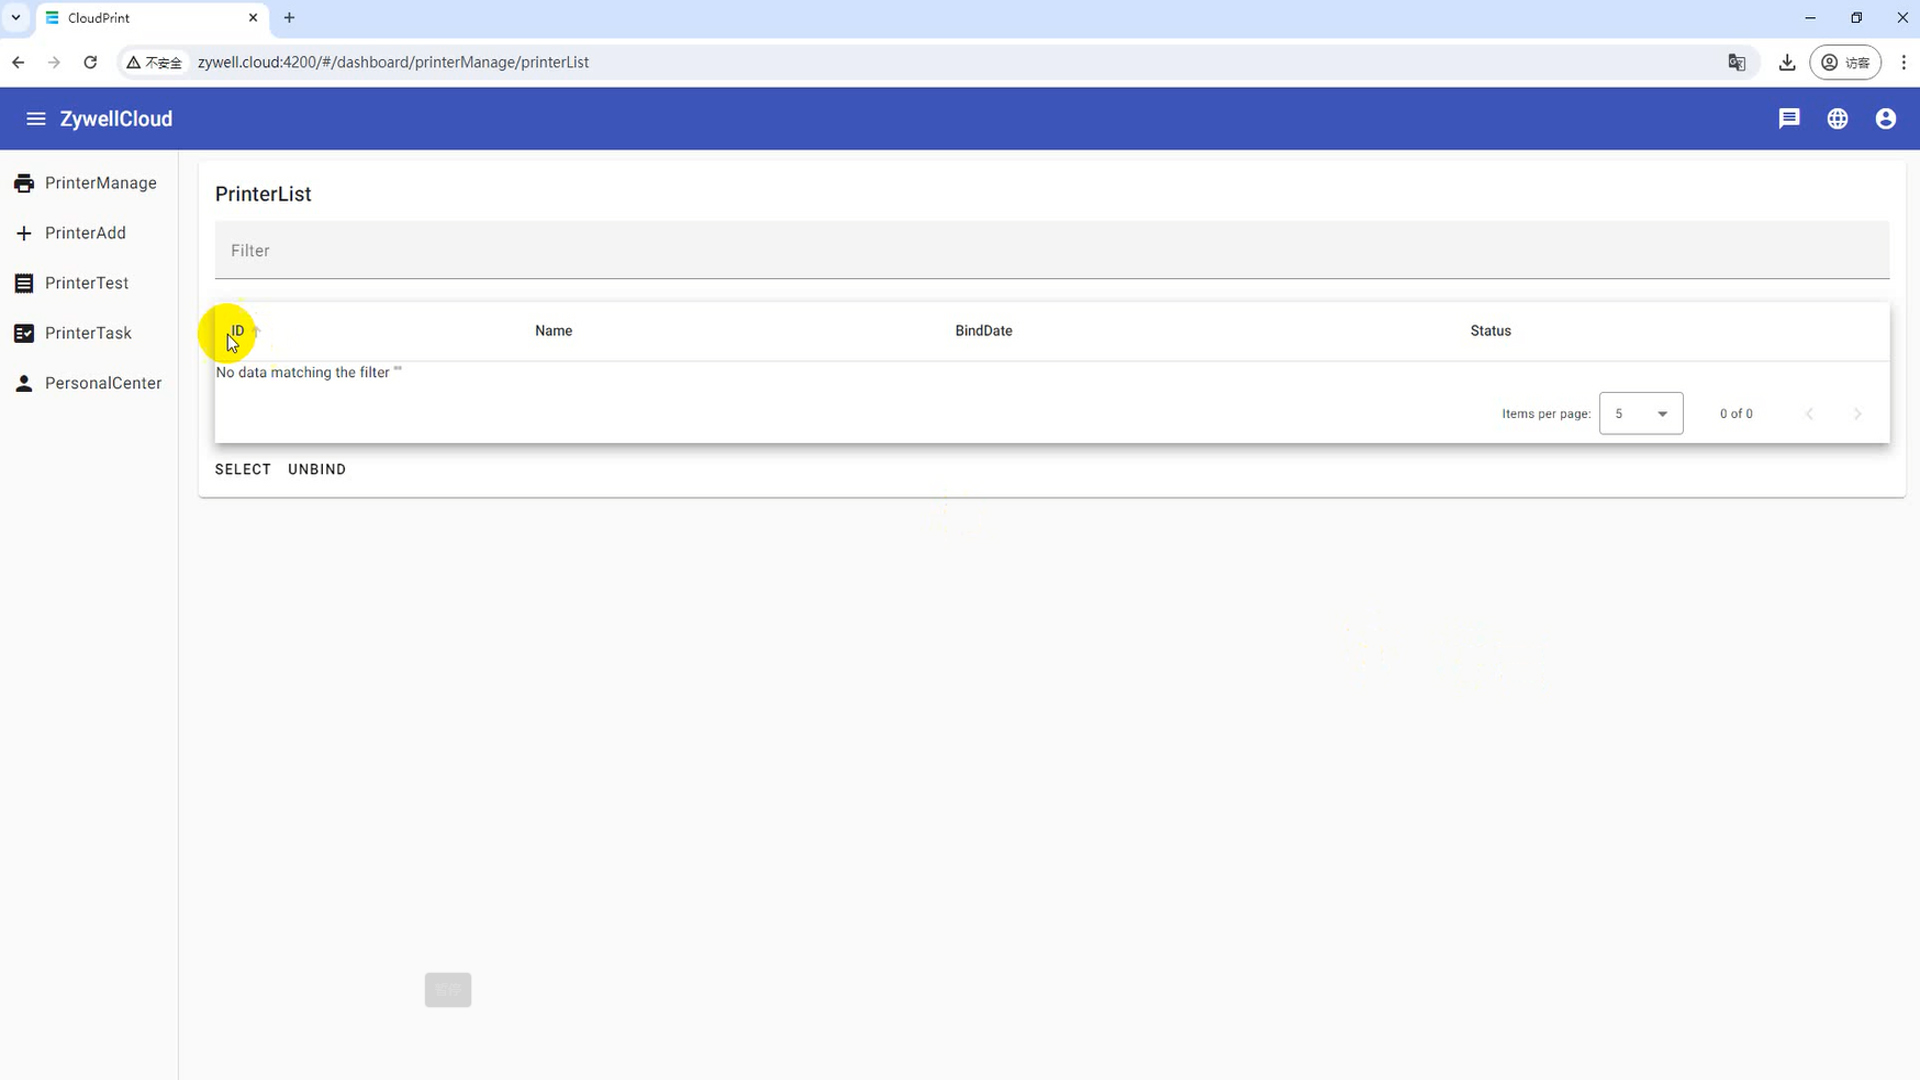
Step 4: Printer management
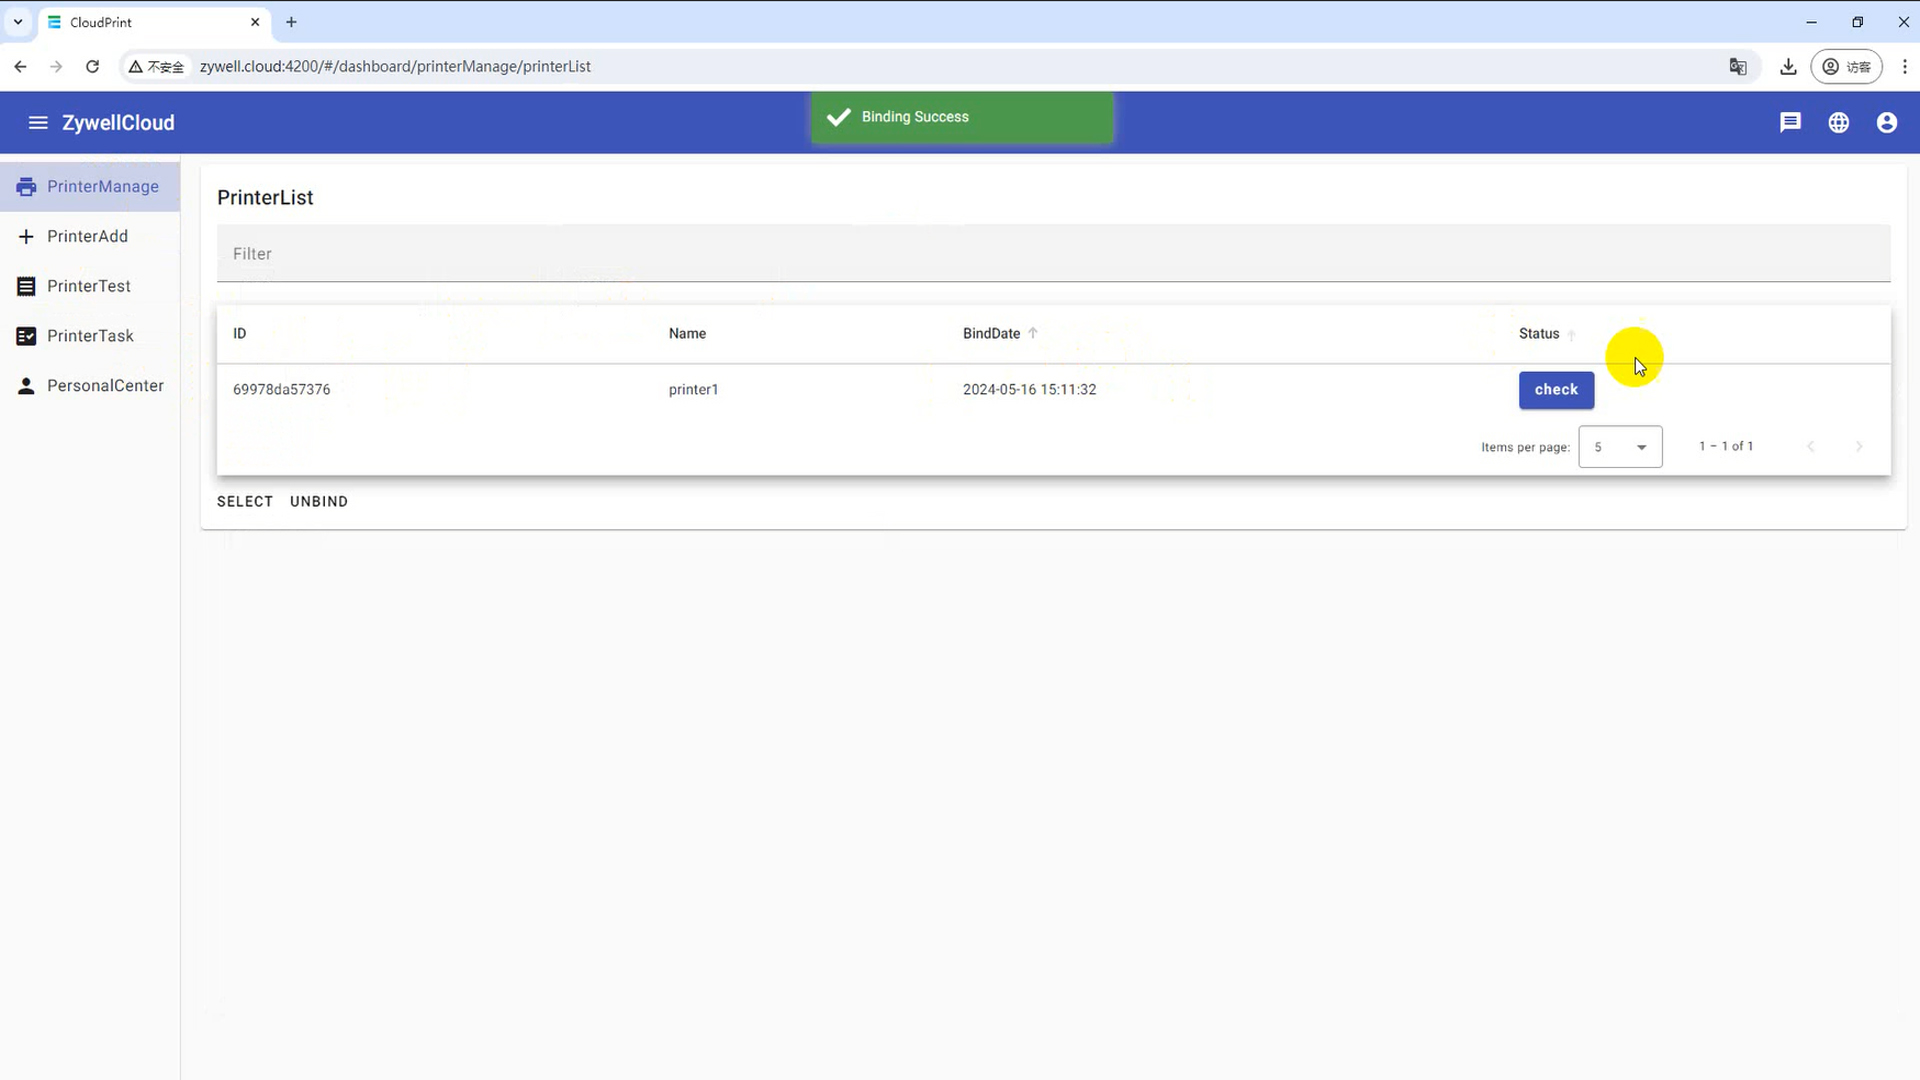
Click the "PrinterManage" button to open the printer management interface
(1) Find a cloud printer
Click "Filter" box, enter "ID", "name", "binding date" any one of the search content automatically displayed
(2) Multi-choice cloud printer
Click the "Select" button to select the check box in front of "ID"
(3) Unbind the cloud printer
Unblock a single cloud printer
① Click the "Select" button and select the cloud printer to be removed
② Click "Unbind" button, pop up the confirmation window, click "Yes" button
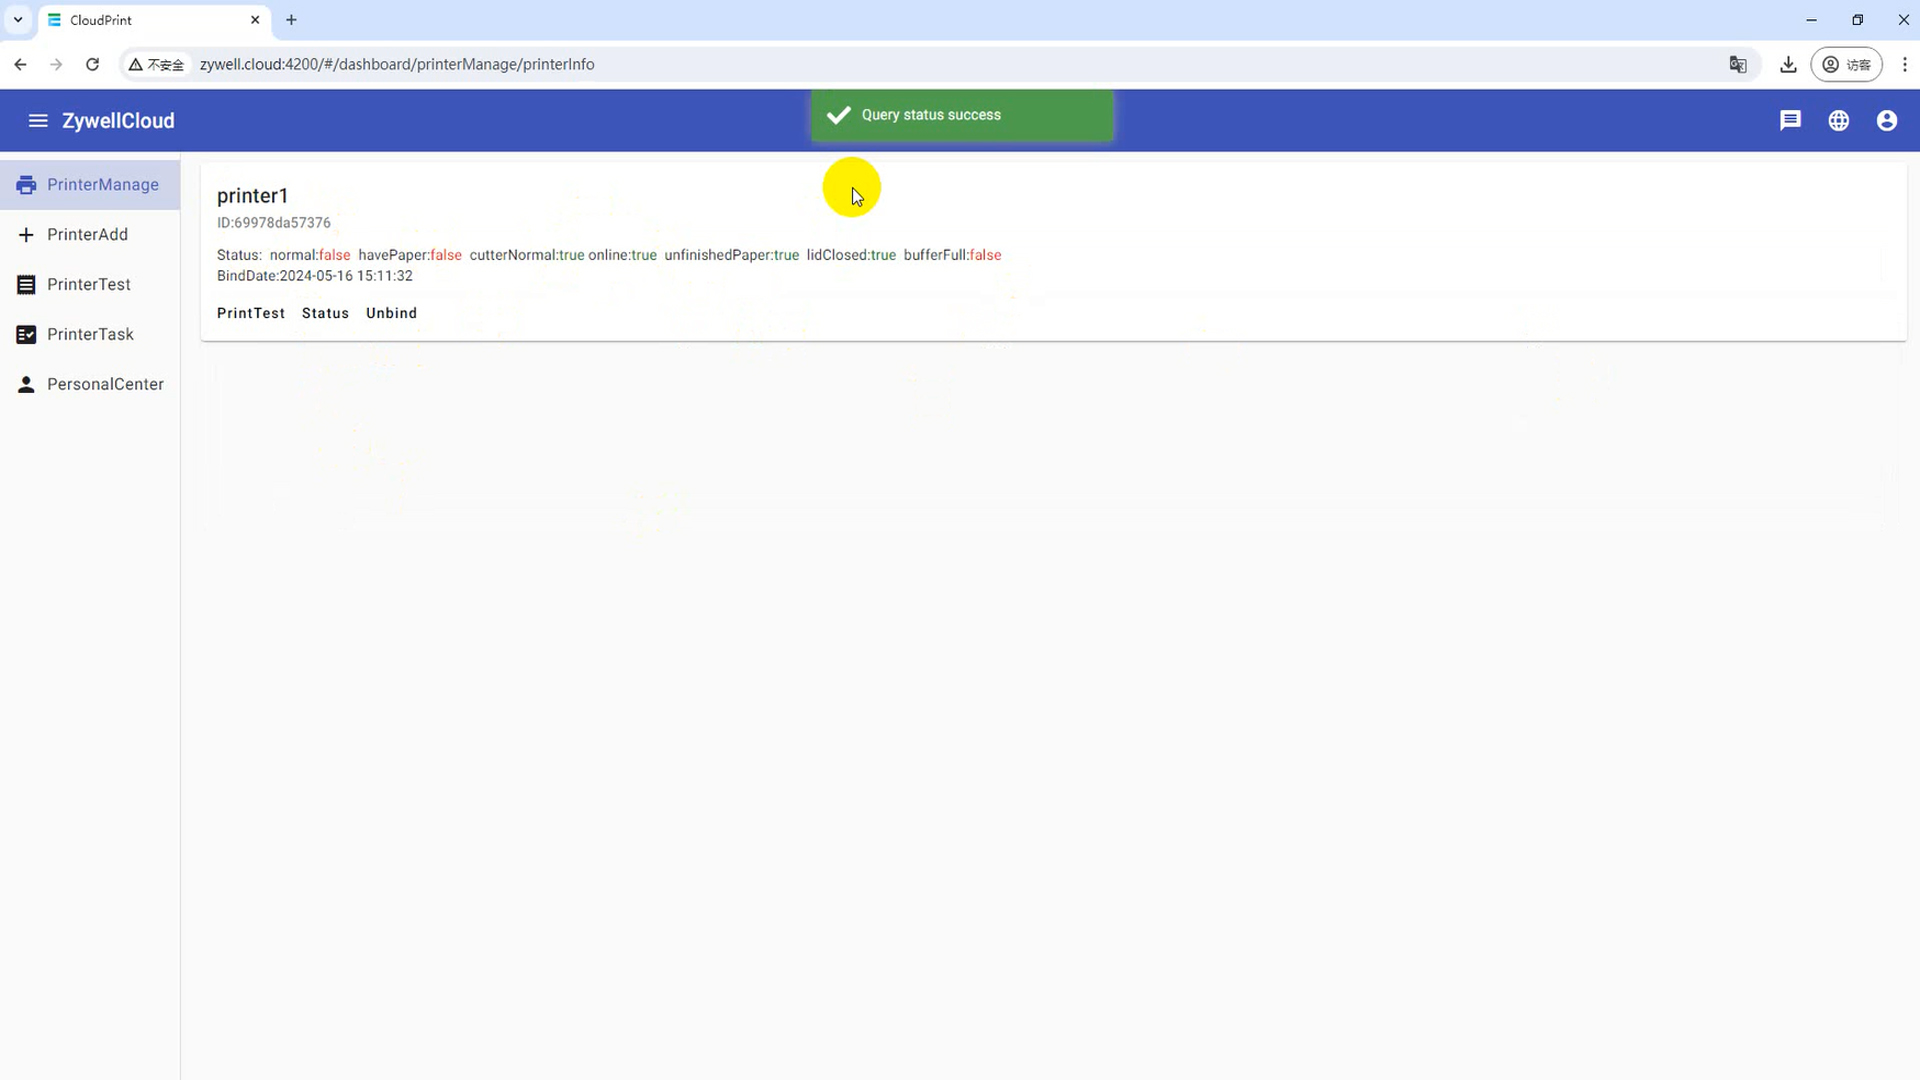
(4) Status view
Viewing Device status
Click the "Status" button to view the current status of the device
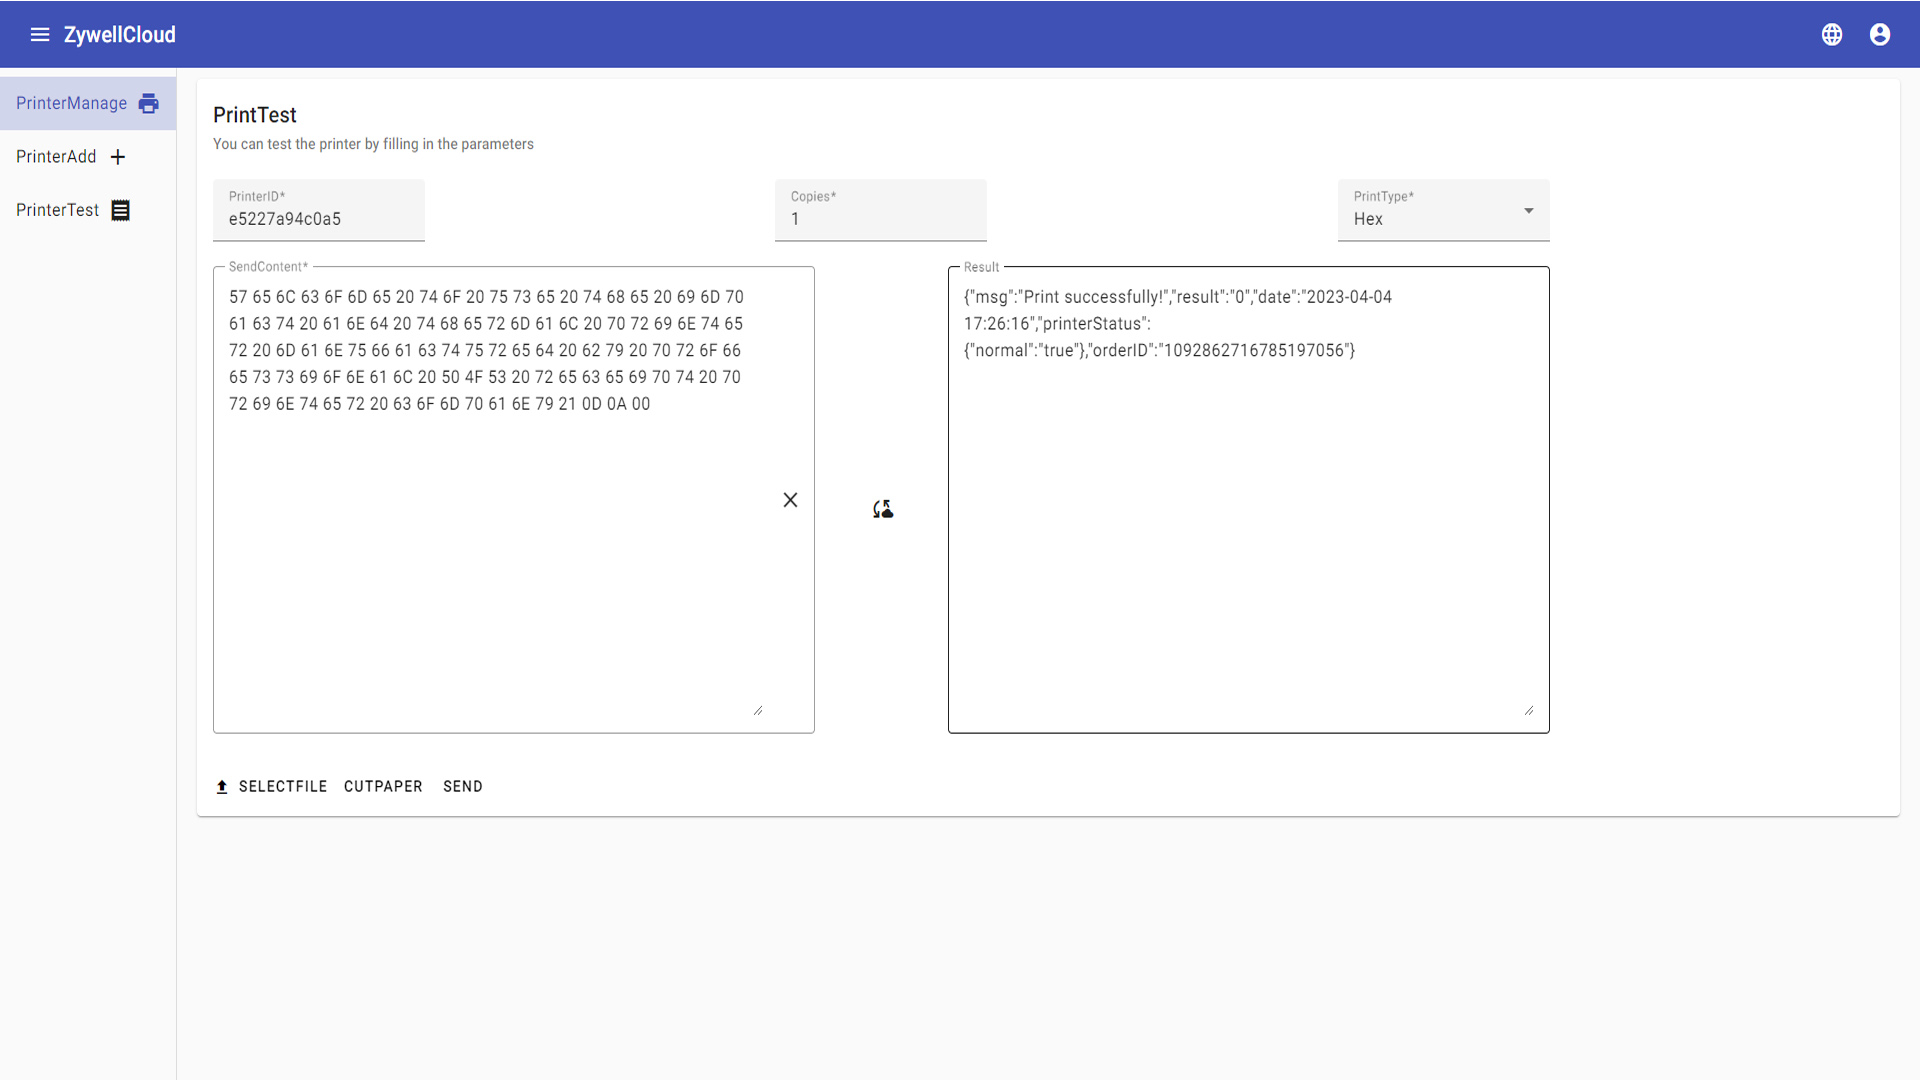
Step 5: Printer test
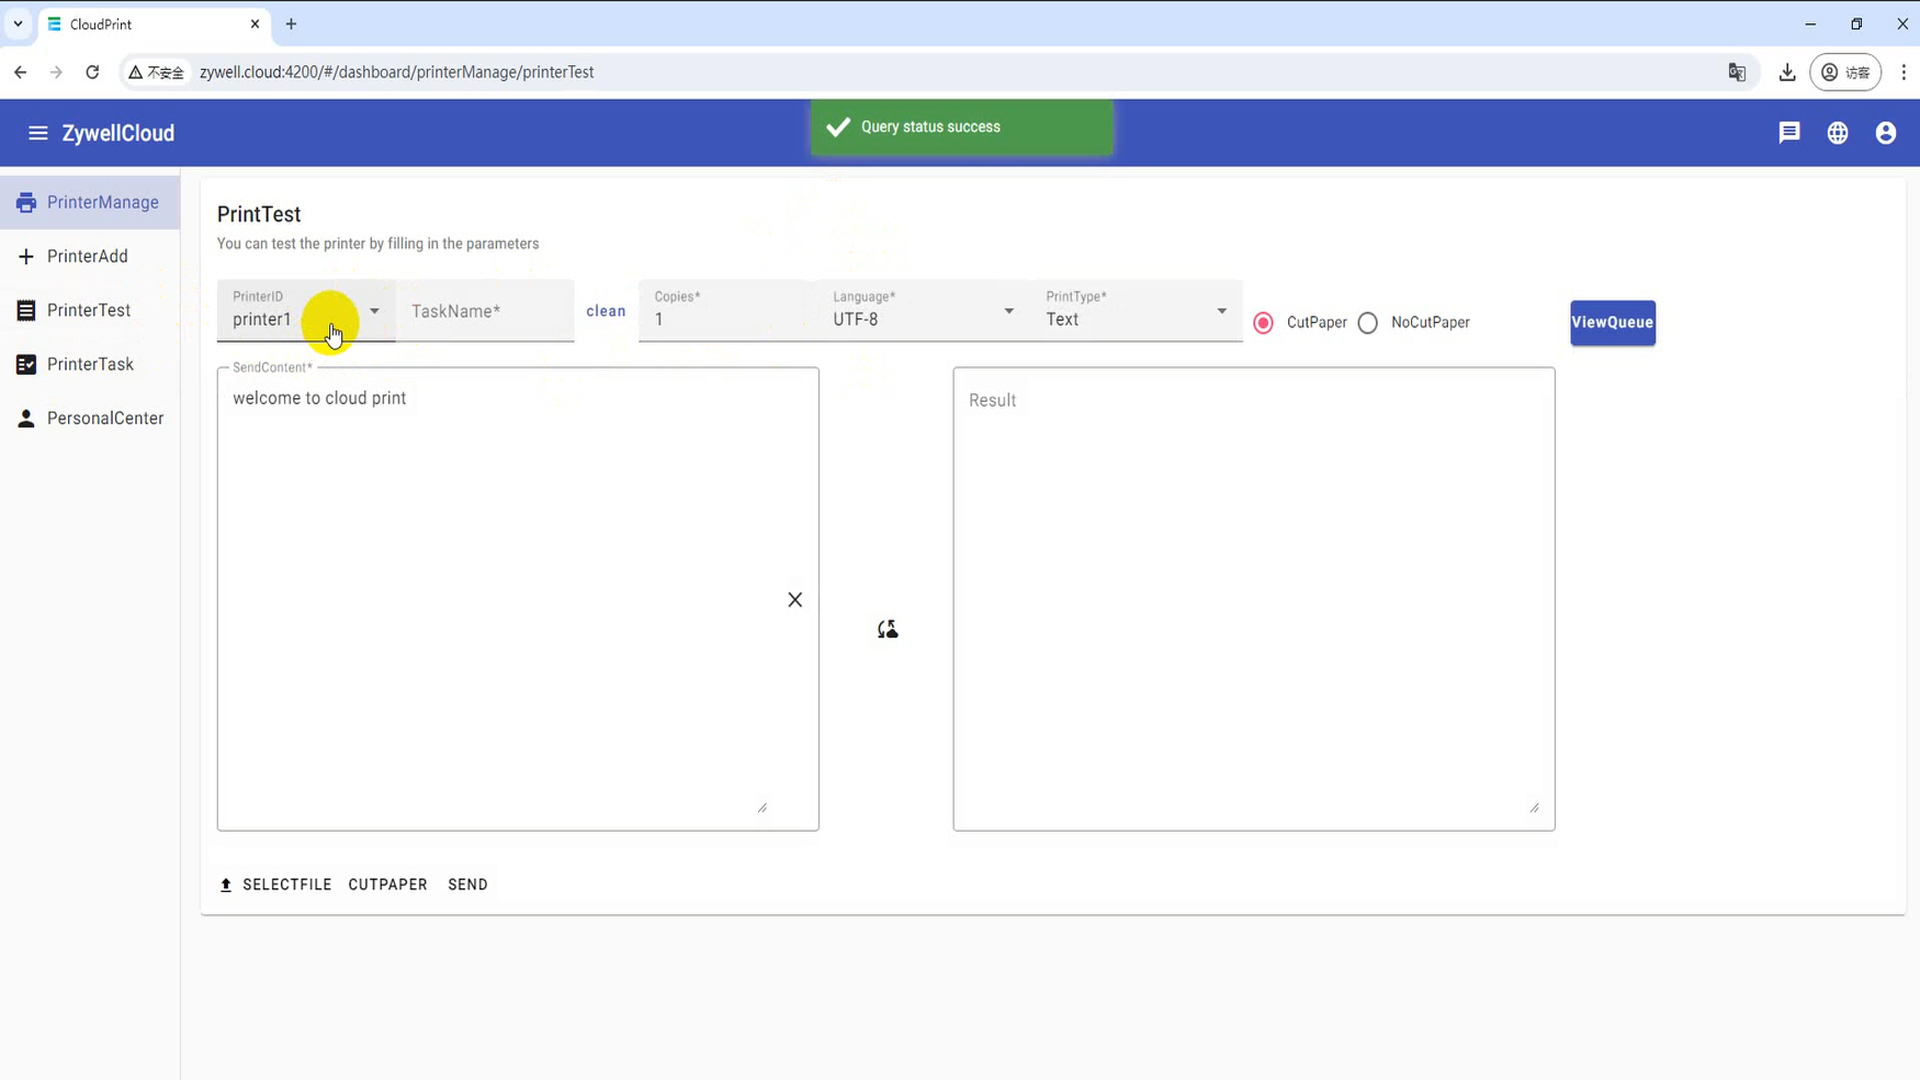
Click the "Printer Test" button to open the printer test interface
Printer id: Click Enter the cloud printer ID
Task Name: Click Enter the cloud printed task name
Number of copies: Click to modify the print number
Language: "UTF-8" to print English, "GBK" to print Chinese
Print type: You can choose to print text, hexadecimal, picture, barcode, two-dimensional code content
Select file: Select the file to print
Cutting paper: Cloud printer cutting paper
Send: Send the printed content to the cloud printer for printing
(1) Print the text
Text box printing
Click the print type, select "Text", enter the print content in the "Input box", and click "Send" to send

(2) Document printing
Click Print type, select "File", click "Select file" to select txt.png.pdf format, and click "SEND" to send
(3) Print hexadecimal
Text box printing
Click Print type, select "HEX", enter the print content in the "Send box" box, and click "Send" to send
Print pictures
Click Print type, select "Image", click "Select File" to select bmp, jpg, jpeg, png format images, and click "SEND" to send
Print bar codes
Click the print type, select "Barcode", enter the barcode content in the "Send box" box, and click "Send".
Print the QR code
Click the print type, select "Qrcode", enter the barcode content in the "Send box" box, and click "Send".
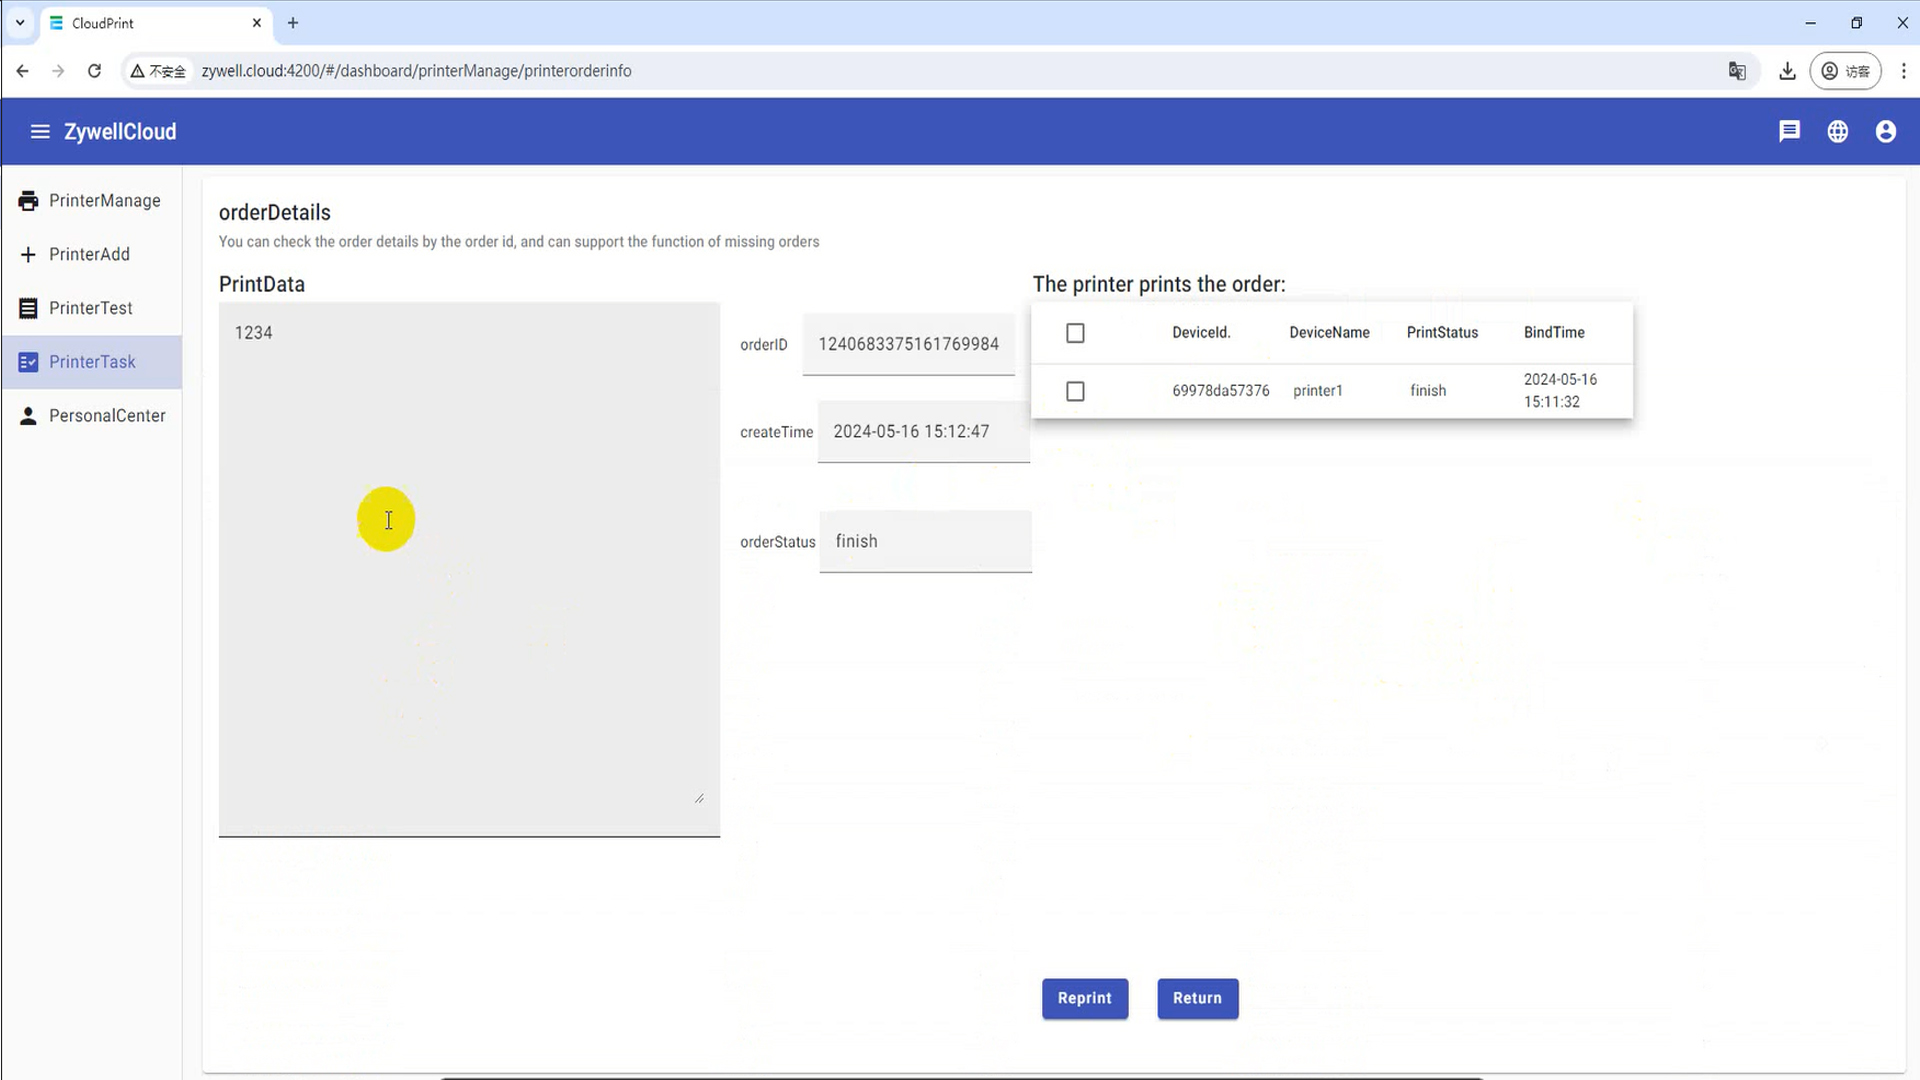
Step 6: Printer task
Printer task You can query the history of a print task and view the print content.
(1) Task name query
Click the task query text box, enter the task id and task name in the "Input box", and select "Query".
(2) View the order status printed by the task queue
(3) View the printed content of the order


Zhuhai zywell is a printer manufacturer and comprehensive high-tech enterprise integrating POS printer design, research and development, production, sales and service.
CONTACT DETAILS
If you have any question, please contact us.